
Brick surfaces endure relentless winter assaults from freezing rain, snowmelt, and ice buildup, accelerating hidden deterioration that homeowners often overlook until cracks appear. With January 2026 bringing persistent cold snaps across many regions, proactive protection preserves structural integrity and curb appeal without demanding a full overhaul. This guide delivers practical steps to fortify porous brick against moisture intrusion and expansion damage.
Understanding Freeze-Thaw Menace
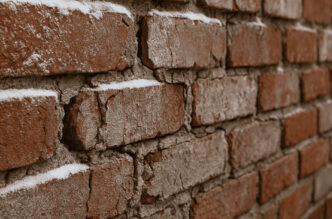
Porous brick absorbs water easily during wet winters, and when temperatures plummet, that moisture freezes and expands by about nine percent inside the material. This internal pressure creates micro-cracks that widen with each thaw-freeze cycle, leading to spalling where surface flakes peel away and efflorescence where salts leach out as white deposits.
Over time, weakened mortar joints crumble, compromising entire walls, chimneys, or walkways. Homeowners in variable climates notice this damage most after prolonged exposure, turning minor issues into costly repairs exceeding thousands.
Spot Early Warning Signs
Inspect brick exteriors now before deeper freezes set in. Look for fine hairline cracks in mortar, bulging or missing pieces in joints, powdery white residue on surfaces, or softened, crumbling edges on exposed areas like patios and foundations.
Test porosity by sprinkling water on a small section; if it darkens slowly or beads up, the surface resists absorption, but if it darkens quickly, it signals vulnerability. Check high-risk spots such as north-facing walls, low garden borders, and chimney bases where snow accumulates.
Prep Surfaces Thoroughly
Clean the brick first to ensure effective protection. Sweep loose debris, then scrub with a mild vinegar-water mix—one part vinegar to fifteen parts water—using a stiff brush to remove dirt, mildew, and old efflorescence without harsh chemicals that etch the surface.
Rinse well and allow to dry completely, which takes 1 to 2 days depending on humidity. Patch any sizable cracks with mortar matching the existing color and texture, feathering
the edges for a seamless integration. Tape off adjacent glass, metal trim, or plants to avoid overspray during the next steps.
Master Sealer Application
Select breathable, penetrating sealers for unpainted brick that repel water while allowing vapor to escape, preventing trapped moisture buildup. Opt for water-based, low-odor formulas safe around families and landscapes, available in concentrates for economical mixing—one part product to seven or nineteen parts water, based on yield.
Apply in mild weather above 40°F using a pump sprayer for even flood coats. Start with two generous layers, waiting 4 hours between layers, and roll or brush into joints for complete coverage; up to 150 square feet per gallon on average porosity. Work from top down, exiting via a door to avoid stepping in wet areas.
Products offering Rainguard brick protection integrate deeply to block oil, stains, and mold alongside water, extending longevity up to five years on vertical surfaces.
Boost Long-Term Resilience
Maintain drainage by clearing gutters and grading soil away from foundations to divert runoff. Shovel snow promptly from brick paths, choosing sand or calcium chloride over rock salt that erodes mortar.
Reinspect annually in the fall, reapplying sealer as water beading diminishes. For indoor brick floors or fireplaces, the same process applies, enhancing slip resistance while safeguarding against spills.
Anticipate painting the future
Sealed brick can accept paint later if desired, though fresh coats need their own moisture shield for durability. Lightly sand glossy spots if repainting, ensuring the base layer remains intact beneath.
These steps, done now amid 2026’s early chills, halt progressive decay and sustain the brick’s timeless durability. Homeowners report fewer repairs and a more vibrant appearance years later with consistent care.