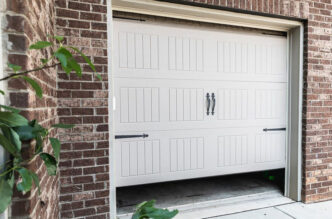

A garage door that stops short of closing creates more than a small inconvenience. It leaves property exposed and interrupts daily routines. Instead of guessing what went wrong, the process starts with noticing small cues such as blinking lights, sensor signals, or an uneven track, says H&M, a leading Santa Clara Property Management company. To diagnose a garage door that refuses to close fully, examine the sensors, tracks, remote settings, and limit adjustments to pinpoint the exact cause before calling for service.
Many issues with a garage door stem from a simple source. Dirt on the sensors, a bent track, or a misaligned trolley often explains why the door will not shut completely. These checks take only a few minutes and often reveal whether the problem requires a minor fix or professional repair.
By understanding what each part of the system controls, anyone can narrow down the cause quickly and restore smooth operation. The next sections outline how to identify the issue with step‑by‑step checks and what to do if the door still refuses to cooperate after basic adjustments.
Diagnosing the Reasons Your Garage Door Refuses to Close Fully
A garage door that fails to close completely often points to a specific issue, such as blocked sensors, damaged tracks, or a weakened power source. Accurate diagnosis saves time, prevents further damage, and helps homeowners decide whether to perform basic checks or call for professional help.
Checking for Physical Obstructions and Safety Precautions
Objects or debris near the bottom of the door commonly stop the closure. Even small items such as leaves, tools, or loose cables can trigger the door to reverse direction. The system detects resistance and responds by reopening to avoid damage.
Homeowners should inspect the area around the tracks and door threshold. Wipe away any dirt buildup and keep the path clear at all times. Snow or hardened mud often hides small blockages that affect the door’s movement.
In many cases, homeowners choose professional help rather than risk injury, especially when dealing with complex spring or sensor issues, which is why services like Houston emergency repairs by Easy Garage Door Repair are often used when a problem can’t be clearly identified. In other major cities such as Dallas or Austin, residents rely on comparable local emergency technicians, while in states like Arizona or Florida, rapid-response garage door services are common due to climate-related wear. Across the U.S., the pattern is similar: when safety is a concern and DIY checks don’t reveal the issue, localized emergency repair services are the more reliable option.
Inspecting and Aligning Garage Door Safety Sensors
Safety sensors prevent injury or damage by stopping the door when something crosses the beam between them. If these lenses fall out of alignment or get dusty, the door may stop short or reverse automatically.
To check sensor alignment, confirm each unit’s indicator light shines steadily. A blinking or off-light means the beam connection is broken. Clean the lenses with a soft dry cloth and remove any items near the beam’s path.
Sensors require precise adjustment. A small shift in angle disrupts their signal. If cleaning does not fix the issue, gently realign each sensor until both indicator lights remain solid. Avoid using force, as plastic housings can break easily. Periodic inspection helps maintain smooth performance and avoids false reversals.
Examining Garage Door Tracks and Rollers for Obstructions or Damage
Bent tracks, loose bolts, or restricted rollers can stop motion or cause uneven closure. Tracks guide the panels, so even slight warping affects alignment. Dirt deposits or rust along the rail also reduce movement.
Inspect both sides of the track for dents or displaced fasteners. Tighten loose bolts carefully with basic tools. Use a soft brush or cloth to remove debris. Avoid lubricants on tracks meant for dry operation as they attract dust.
Rollers should move freely without wobbling. If they stick, apply a light silicone-based lubricant to the bearing point only. Doors that appear crooked or tilt to one side require adjustment by a trained technician to restore balance and prevent roller derailment.
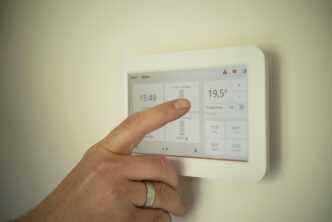
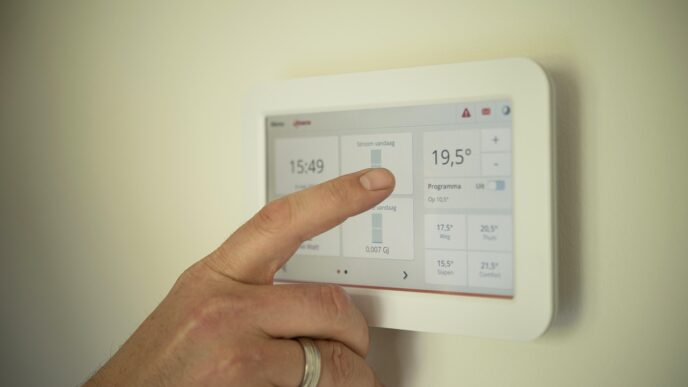
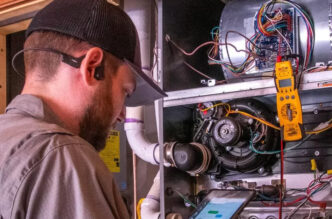
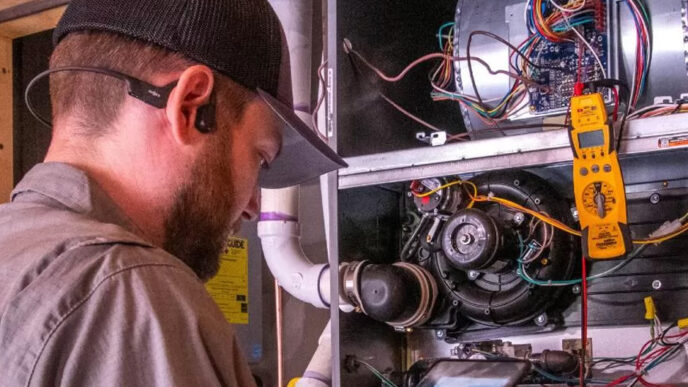
Testing Power Supply and Garage Door Opener Functionality
An unresponsive opener or sudden loss of power stops closure even when the mechanism appears fine. Check that the opener is securely plugged in and the circuit breaker has not tripped. Replace weak batteries in remote controls and confirm light indicators on the wall unit function correctly.
If the motor operates but the door does not close, inspect the limit settings. These determine how far the motor should lower the door. Adjusting them incorrectly causes early stops or reversals. Most openers have small dials or screws labeled for this purpose.
Frequent power surges or outdated wiring can damage internal circuits. In such cases, a professional should test voltage and opener performance. Regular maintenance protects electrical components and guarantees the system operates safely without interruption.
Addressing Additional Causes and When To Seek Help
A garage door that refuses to close fully may be caused by control issues, worn mechanical parts, or incorrect opener settings. In some cases, the problem requires professional maintenance to protect the system’s safety and function.
Troubleshooting Garage Door Remote and Wall Controls
If the garage door does not respond to the remote or wall switch, the issue may relate to power, batteries, or signal interference. Start by confirming that the opener motor receives power and that the indicator lights are active. Replace remote batteries and verify that the wall control wiring is secure.
Next, test the door through both controls. If the wall switch operates the door but the remote does not, the remote or receiver may have lost programming. Re-pair the remote with the opener following the manual’s procedure. Also, check for nearby electronics that might interfere with the remote signal.
If neither control works, inspect the circuit breaker or fuse. Reset a tripped breaker and test again. Persistent failure after these steps usually points to a faulty opener board, which a garage door repair service should inspect.
Assessing Garage Door Springs, Cables, and Emergency Release Cord
Tension components like garage door springs and cables carry heavy loads. Extension springs or torsion springs may stretch or break with age, preventing the door from closing evenly. A visible gap in a torsion spring or a loose cable signals a serious defect.
Do not attempt spring or cable repair without training. These parts remain under high tension and can cause injury. Instead, disengage the opener using the red emergency release cord and lower the door manually to check its balance. If the door feels too heavy or drops suddenly, damaged springs or cables likely cause the issue.
Keep all moving joints clean and apply a light coat of garage door lubricant to rollers and hinges. Smooth motion prevents unnecessary stress on the cables and opener motor, extending the system’s lifespan.
Adjusting Garage Door Opener Limit and Force Settings
The opener’s limit switches control how far the door moves before stopping. Incorrect settings may cause the door to close too far or reverse before sealing shut. Locate the adjustment screws or dials on the motor housing, usually labeled “up” and “down.”
Turn the “down” limit adjustment slightly to allow the door to close more fully. Test after each minor change. If the door reverses at the floor or stops short, adjust again in small increments. Likewise, if the door requires more force to move, fine-tune the force setting to reduce strain.
Avoid large adjustments. Excessive force can mask mechanical faults and damage the door. If the opener still stops early or reverses without obstruction, the internal sensors may need calibration by a garage door technician.
Knowing When to Call a Garage Door Technician or Repair Service
Homeowners can handle small tasks like cleaning sensors or resetting remotes, but more complex issues need professional attention. A garage door service professional has tools and training to repair broken springs, cables, or motor drives safely.
Call a qualified garage door technician if the door looks uneven, squeals loudly, or will not move even after basic troubleshooting. Electrical failures or control board errors also require expert handling to prevent further damage.
Professional technicians inspect components, replace worn parts, and test the system for proper balance and garage door safety compliance. Scheduling regular maintenance reduces future breakdowns and helps catch problems before they affect daily use.
Conclusion
A garage door that will not close fully often points to a simple cause. Dirt on the sensors, small alignment shifts, or a loose limit screw can stop the door partway down. By checking each common issue step by step, homeowners can often spot the real problem faster.
Regular inspection and light maintenance help prevent repeat trouble. Cleaning sensors, applying lubricant to moving parts, and checking cables for wear can keep the system in steady shape.
If basic adjustments do not solve the issue, it likely involves a mechanical or electrical fault. In such cases, professional repair guarantees safe and proper operation.
Taking a careful and methodical approach saves time and reduces risk. Each test or adjustment provides useful clues that guide the next step toward a properly closing garage door.